

With over 35 million users its seems linktree is your go to link in bio to put all your links in one place for your visitors. It’s the go to for social media profiles and linktree has capitalized on that. It makes sense since they came up with a clever solution. Its a no brainer why creating your own free linktree alternative can be beneficial. As an inquisitive person always wanting to create my own I wanted to test my hand at this design. So that’s what I did.
I learned to create my own personal linktree if I ever wanted to use it and it can be customized anyway I please but I decided to go for the simple layout. Now I wanted to show others how to create their own if they wanted to make their own personal website and see just how simple it is to replicate it for more control.
How to make a linktree website in 6 easy steps
Its not hard to create this simple one page layout and I will show you step by step how to do this. The best part about this is you do not need to know any code and if you already have a website its free.
3 Things you’ll need
- Hosting and domain
- WordPress
- Elementor
Setup and Installation
- Get hosting and a domain name
- Install wordpress
- Download the plugin Elementor
- Create a new page
- Design your page
- Publish
Step 1 Get hosting and a domain name
Before you can do anything you will need a website and in order for you to do that you will need to get hosting and a domain name. If you want to know how to set one up then you can check out my how to make a website guide here. If you already have this setup then you can move on to the next step.
Step 2 Install WordPress
Ok if you already have hosting then you can install WordPress in order to create your very own custom link in bio page. If you already have WordPress setup and installed then we can move on to the next step. If not, you can also follow this installing wordpress guide on how to setup and install WordPress on your Cpanel.
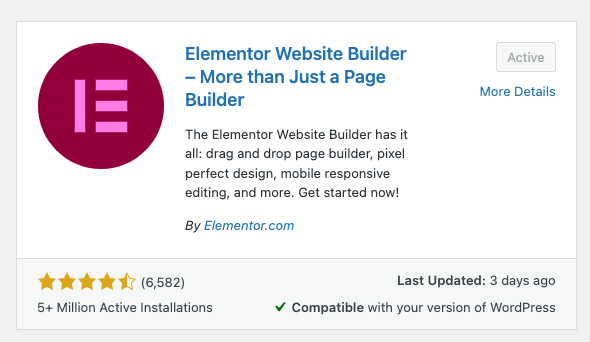
Step 3 Download Elementor
Before we move on to downloading Elementor I want to give a quick overview of the WordPress dashboard so you can at least navigate around if you don’t know. Of course there is so much to WordPress but I want yo to know at least the basics on where to find the things you need for this tutorial.
The WordPress Dashboard
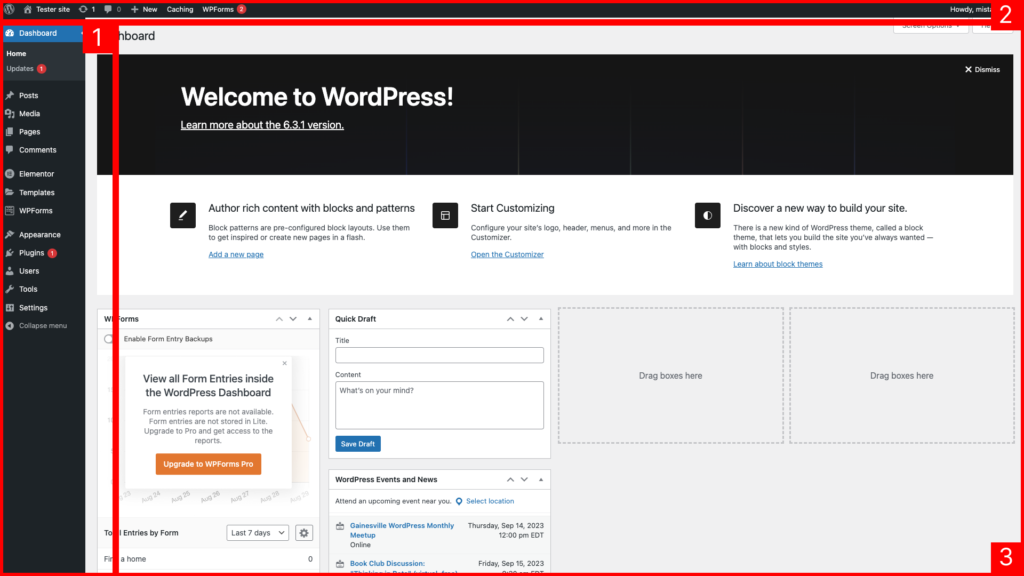
- Main Navigation: This is your menu to create new pages, posts and access different settings to customize your web page
- Top ToolBar: A quick access menu to view your site and get to common used elements such as new page or posts
- Work area: whenever you click on a menu item the page will load in this area for you to edit
Now that you know the dashboard you will be able to get around a little easier
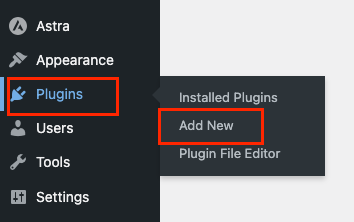
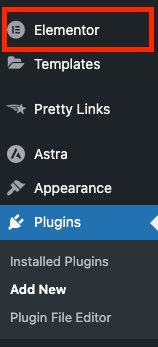
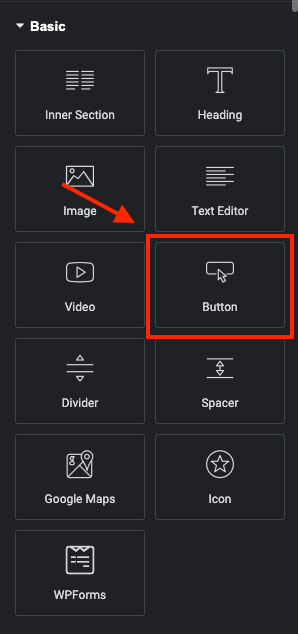
First go to plugins menu on the main navigation and click on “add new”
In the search bar look for the plugin Elementor, then download it and activate it.
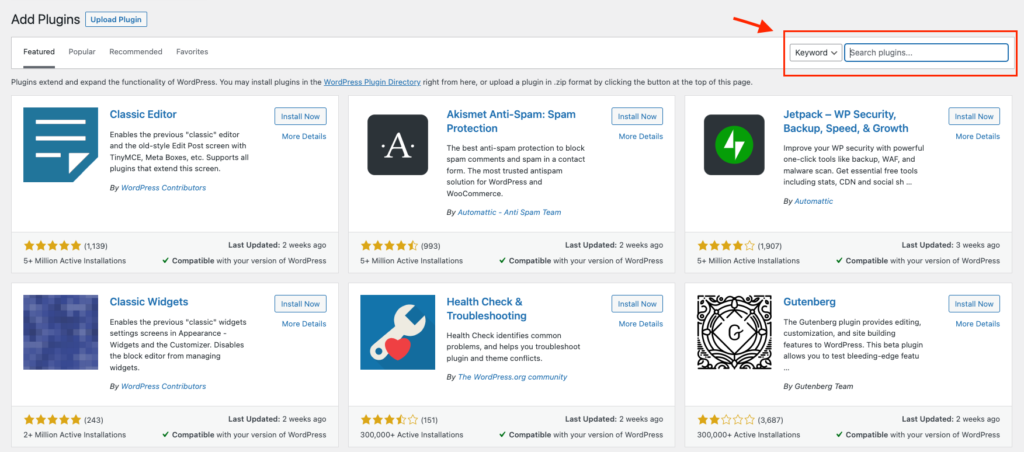
After its been downloaded and activated you should see the Elementor tab pop up on main navigation menu.
Step 4 Create a new page
This is going to serve as the page that you send all your visitors to. There are two ways you can set this up.
- You can set it up as a completely separate page or
- Let it be your home page so when visitors go to your website they will see all your links
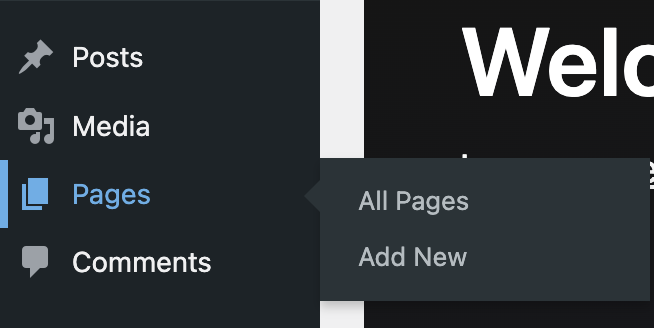
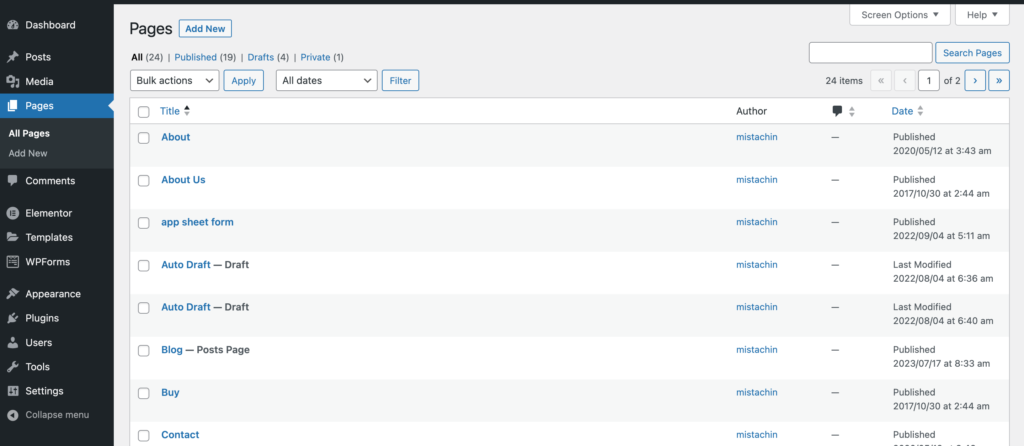
To continue adding a new page hover over pages and you will see the add new option you can click. Another way is by when clicking on pages and when the new window opens locate the add new button at the top and it will open a new page
On the new page locate the title section and name it “links“. This will serve as the url of the page. Don’t worry we won’t see this on the page.
Note: Btw if you want to name it something else feel free to do so this is your page so you can customize it any way you see fit. Just remember the title will be seen in the url.
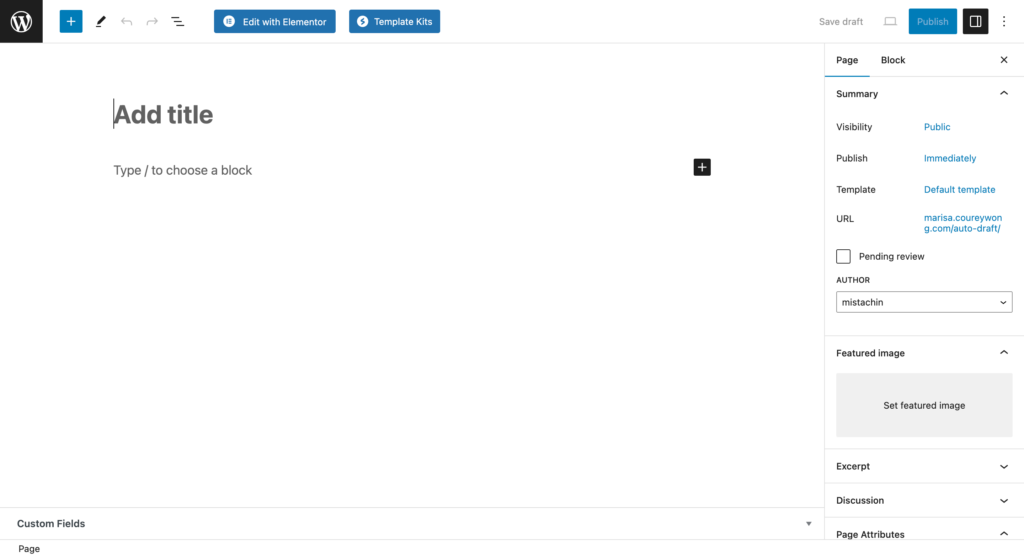
Ok once you title the page we are going to click on the button edit with Elementor.

Once elementor opens up your screen should look like this
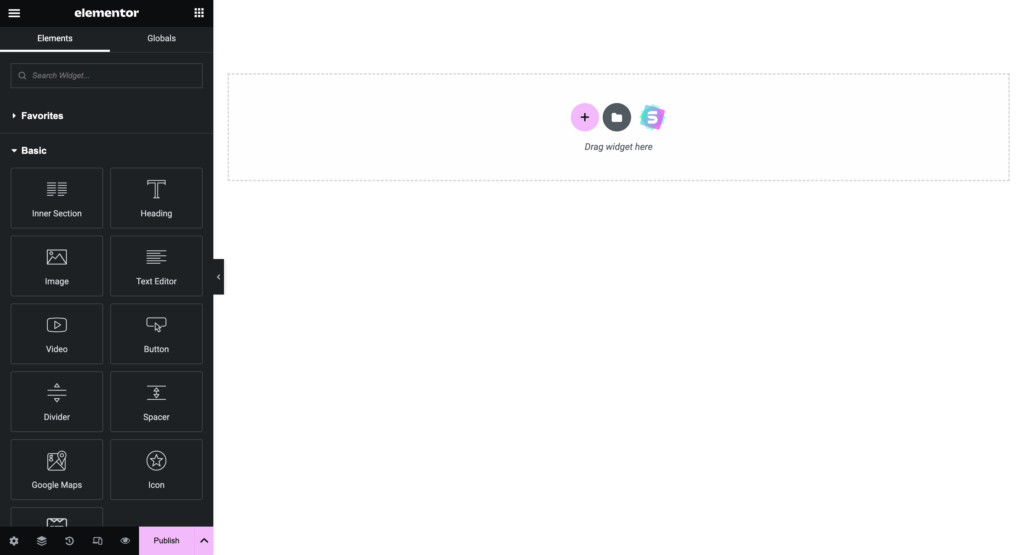
we are now going to start designing your page
Step 5 Design Your Page
First lets get to know your work panel, or the Elementor interface, where we will be designing everything
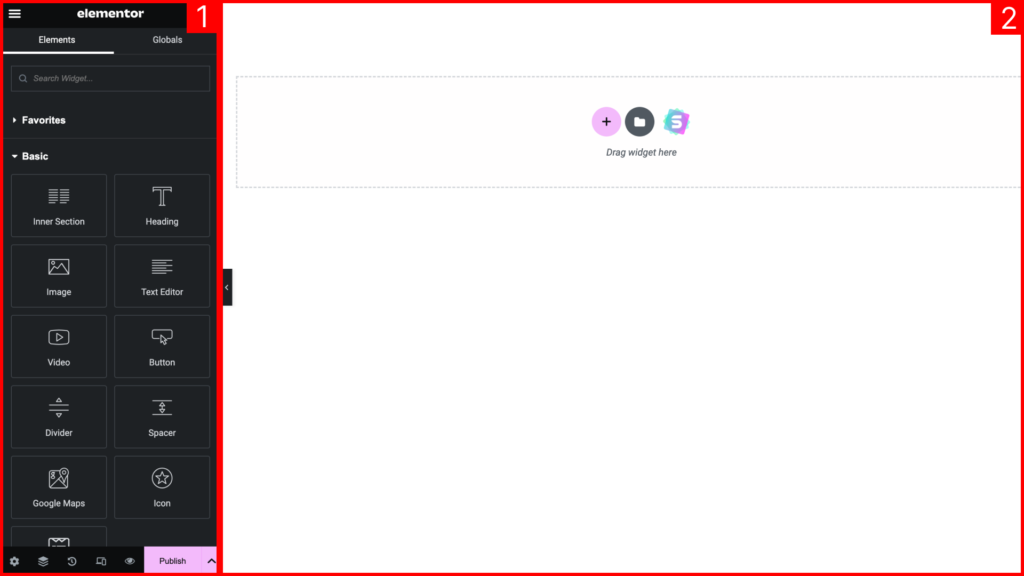
- Widgets/ Edit panel: This is where you can choose the different elements you wan to drag into to design as well as edit selected elements in your design
- Editing Window: This is where you will see your designs come to life and where you want to place elements in relation to another
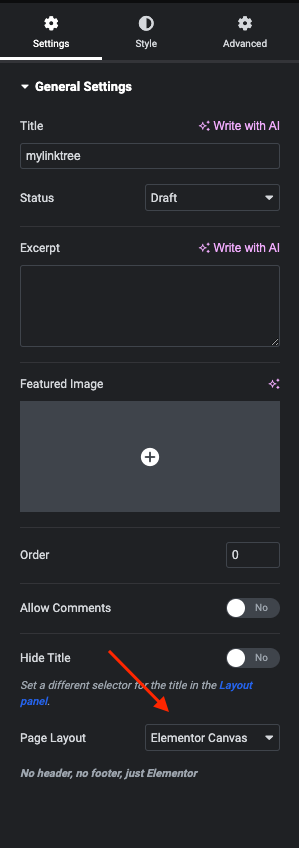
If your page doesn’t look like this we need to setup the layout of the page to canvas which you can find in the settings at the bottom of the widgets panel
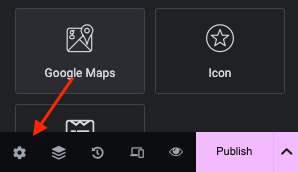
Locate the page layout option in general settings and set it to Elementor Canvas
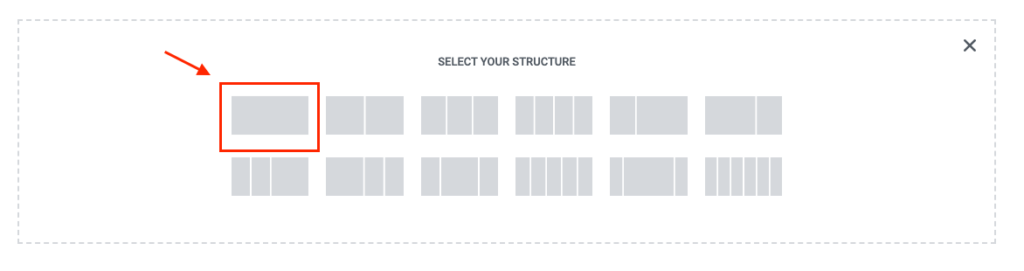
Choose column structure
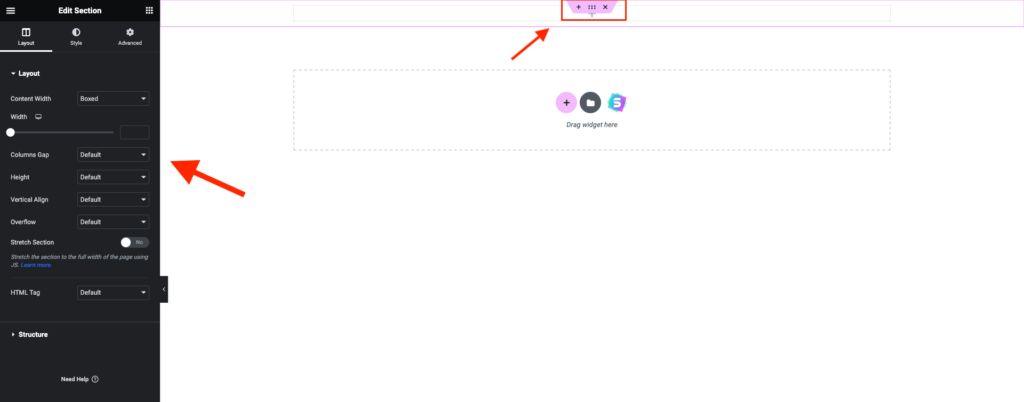
First thing you’re going to do is add a section by pressing the pink + button in the editing area and choose the page structure layout that has only one column.
You should now see a thin pink box with 3 options at the top. To the left on your “Edit section panel” you have the ability to make changes.
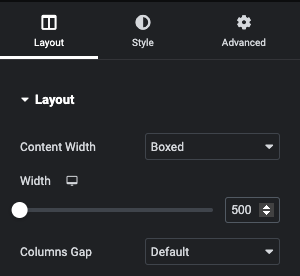
Change height and width
First change the height to minimum height it and then change the value from px to vh. This will change the height of the section to the views (device screen) height depending if its on desktop, tablet, or mobile. Once you change the value to vh make sure you change the slider to 100.
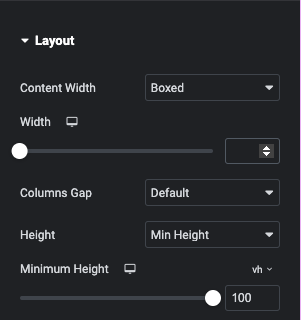
Now change the content width. The default should be Boxed and below that you should see a slider and next to the slider an input field. There you can just type 500. I personally like 500 which I think is a good width that fits naturally on desktop and tablet.
You probably don’t see the difference right now but don’t worry we’ll add a background and things will start to take shape.
Add background image
If you don’t have a specific image there is a great website where you can find free stock photos called Unsplash. They provide high quality images that you can use as placeholders for your background.
There are two ways you can add your image to the background: through a link or downloading and uploading it to your library.
We will use a link (or url) for this demo but uploading to your library is the same process.
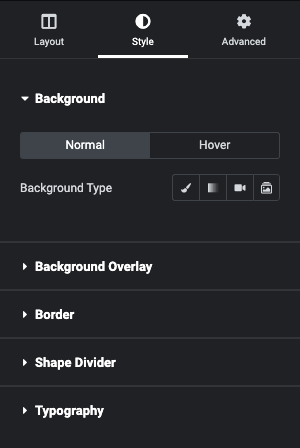
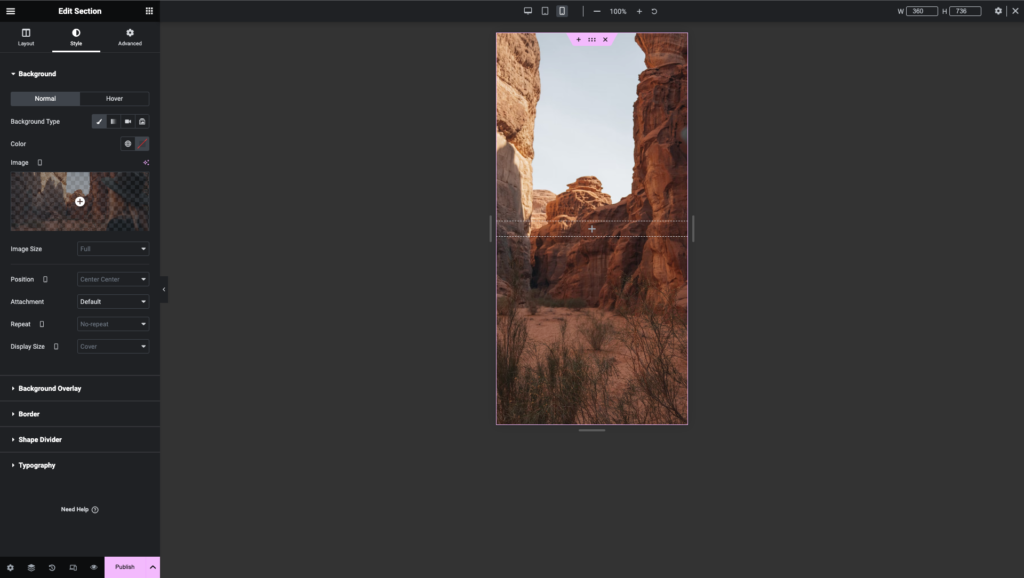
If you’re still on the edit panel for the section at the top you should see a tab titled style and on that panel look for background type and click on the first icon the paintbrush. You should then get the option of changing the color or add an image. Click on the plus sign and then look for the option insert url on the left.
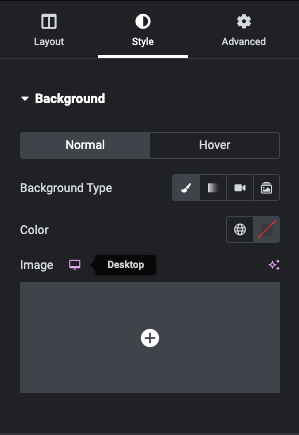

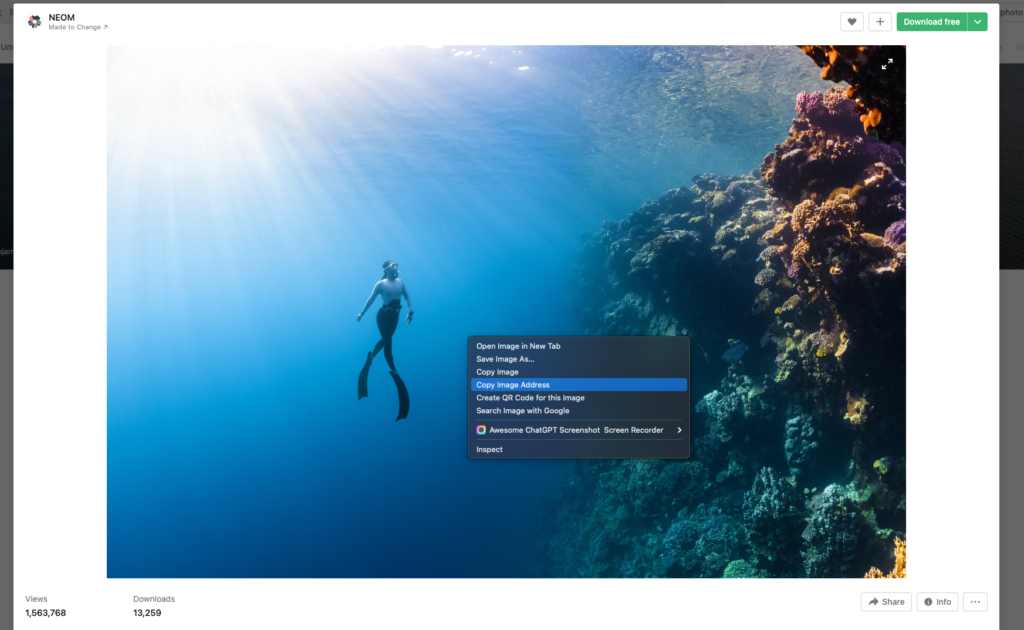
Find an image on unsplash (1920 x 1080 works best) click to open the image then right click to copy the image url.
Paste the image url from unsplash and you should see the image come up then click insert into post on the bottom right. Now we have to make a few adjustments. Below the image you just added you should see some options such as image size, position etc.
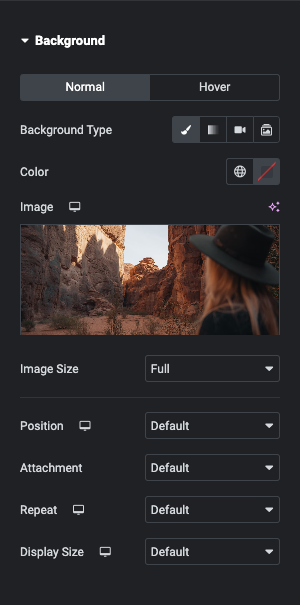
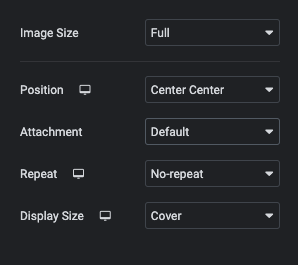
Here are the changes your going to make
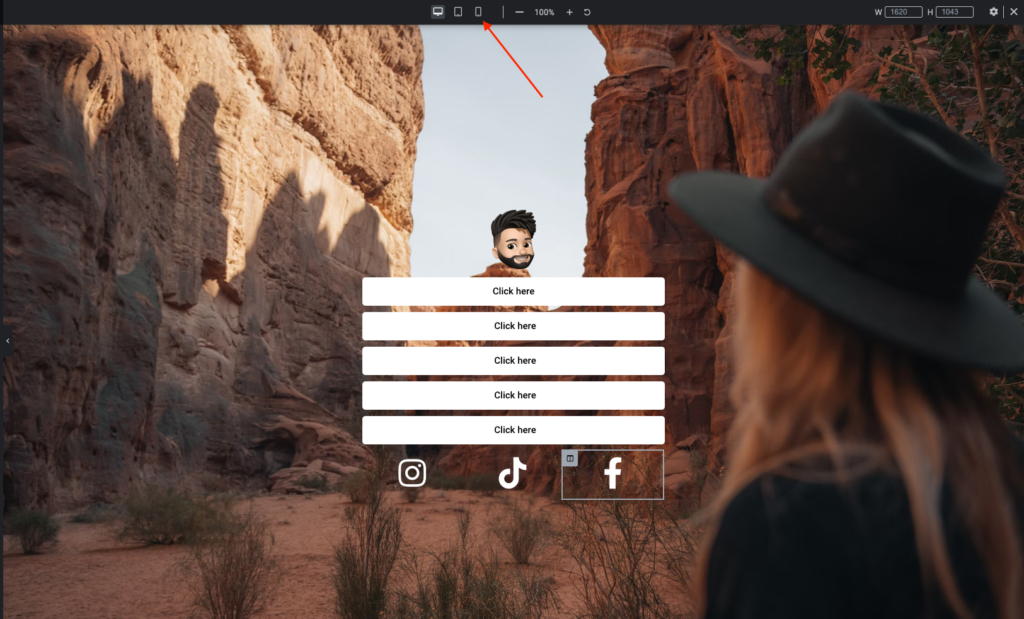
And thats it, your page should be starting to take form. Before we move on I want you to toggle on the Responsive mode button at the bottom of the edit panel.
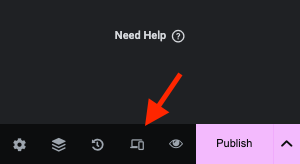
This will allow you to see what your design looks like on all 3 versions: Desktop, tablet, and mobile (mobile being most important.) To change them there will be 3 options at the top of the page
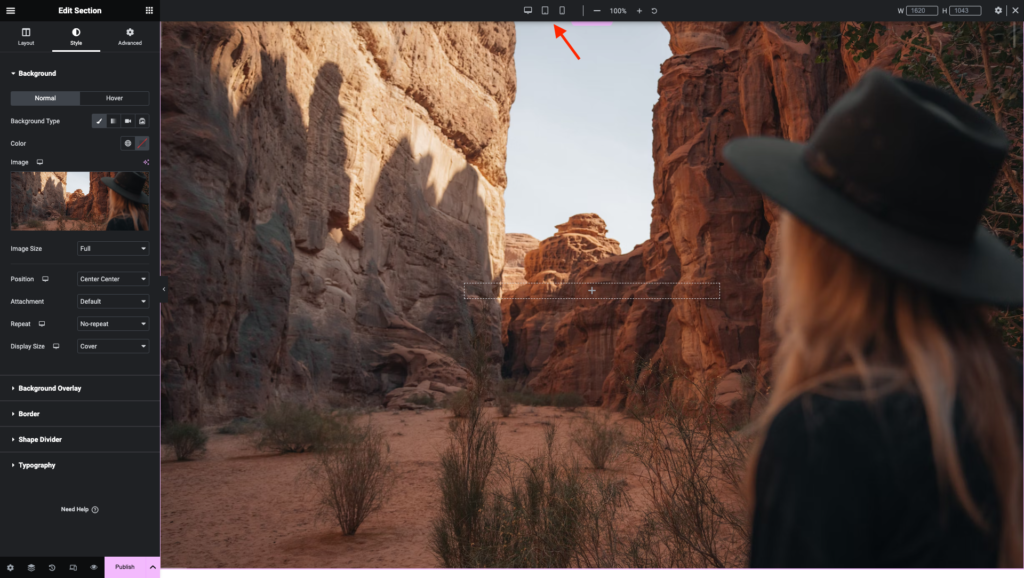
You can now see what it will look like in mobile view
Now on to the next thing your profile pic
Adding a profile image
It’s now time to add elements. If you’re familiar with linktree you know you need a profile image.
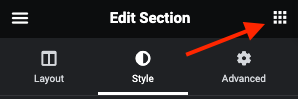
Locate the grid icon at the top right next to “Edit Section” panel. After clicking you will then be given a list of element options you can add to your page. Locate “image” element and drag over to the plus sign.
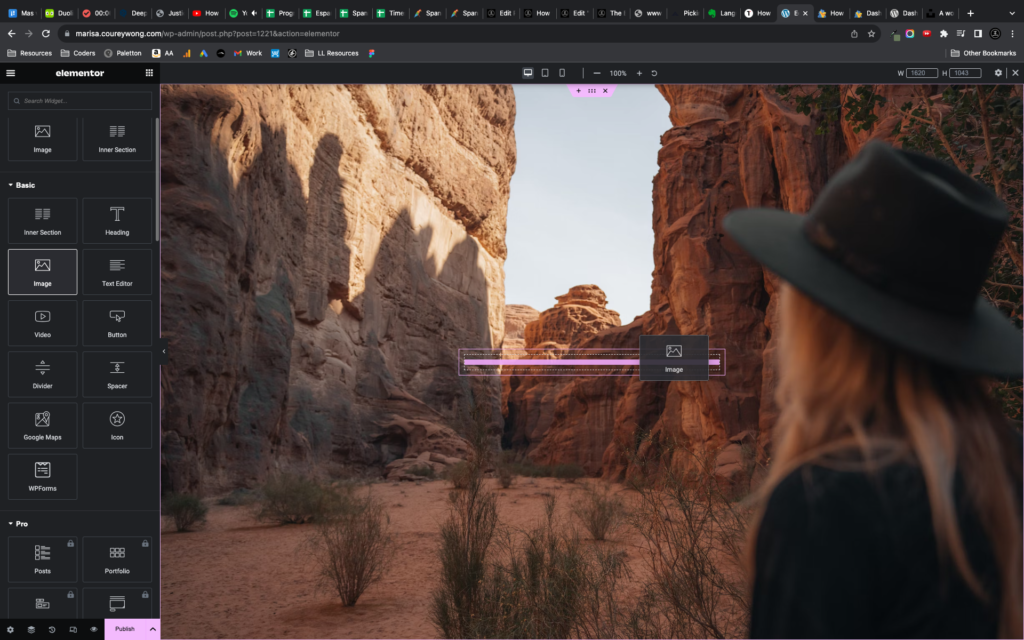
You should now have a place holder to add an image. To select and edit the image click on the image place holder in the middle of the screen. Your edit panel should now change and replacing the image works just like how we changed the background for the section. Choose your image and bam your almost done. Again we need to make a few adjustments.
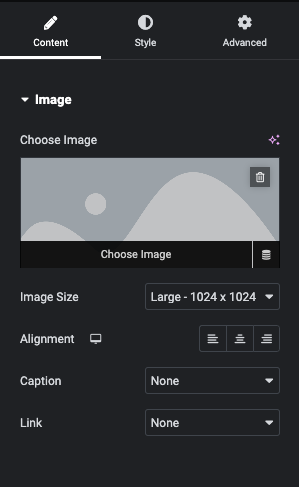
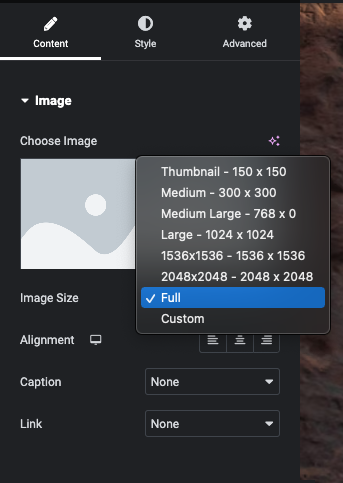
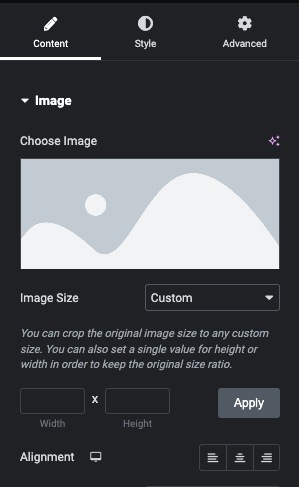
First is the size of the icon. Locate the image size on the edit panel click for a dropdown option and choose custom. From there your going to type in 100 x 100 and click apply when finished.
(Note: it helps if your profile is square and centered, dimensions 1080 x 1080)
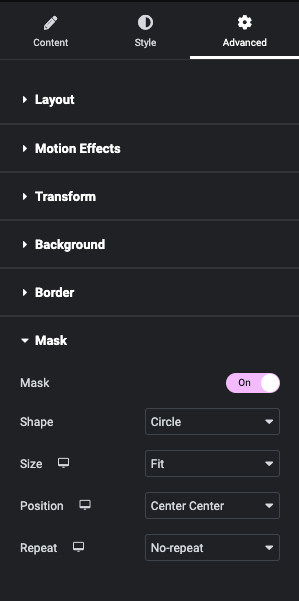
Next we’re going to change the shape of the image by adding a mask. This helps if your image has a background. You can also do this by changing the border radius but we will use the mask for now. Head over to the advanced tab and look for the mask option and toggle it on. You should now have your image in the middle of a circle.
You should now have your profile image complete and ready
Next are your buttons
Add buttons
Locate the button element. Once you find it drag it under the profile image until you see the highlight of the placement like before under the profile image.
You should get a default button and now it’s time to make some adjustments to the design.
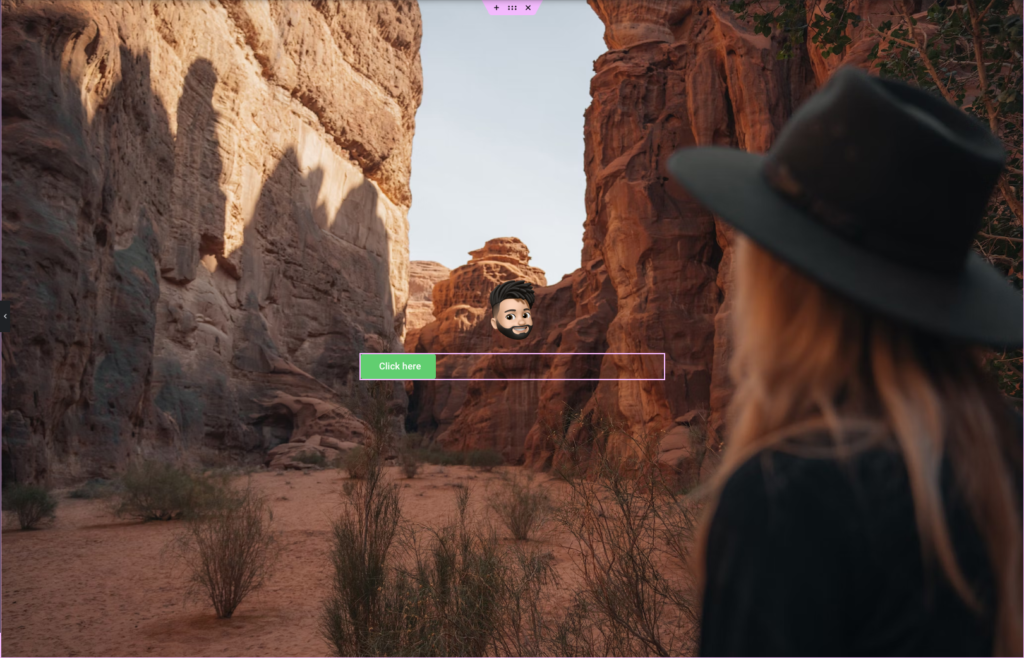
First thing we want to do is center the button by clicking the justified alignment option right under the link tab. This will stretch you button according to the width of your container.
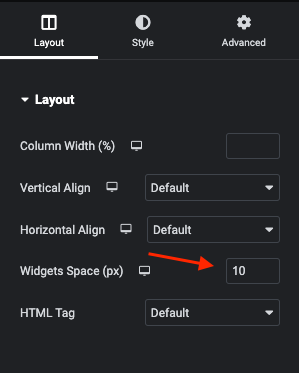
Before we move on let’s give some room between the elements. To get back to the column properties click on the little grey box that is in the left corner of the box.
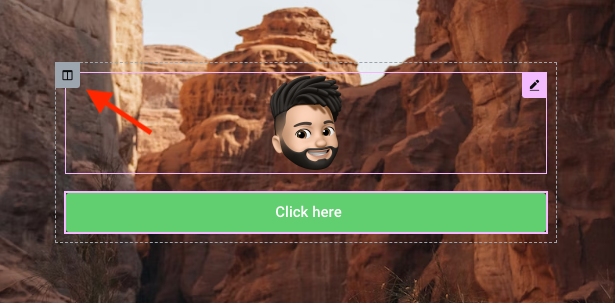
Once the edit properties come up, locate the widget space and add 10.
You should see the elements now have some padding between each other. You will see it even more when we add more buttons. But before we do that let’s give our button a little design. Click on the button to edit and click on the style tab customize our design.
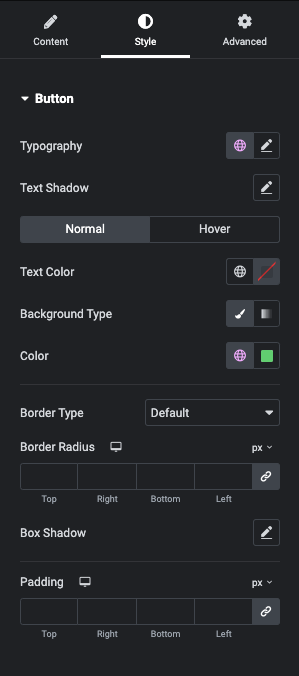
First let’s add a border radius to give our buttons a little rounded corner and give your border a radius of 5px, simple and subtle and the padding 15px. Now to change the text color you should see the “Text Color” option above the border type and below background type is the “Color” for the background. Click the square section next to the globe icon to change the color.
Let’s start with black for the text color and white for the background (black’s hex code is #000000 and white’s hex code is #FFFFFF or you can use the slider). Your panel should look like the image below.
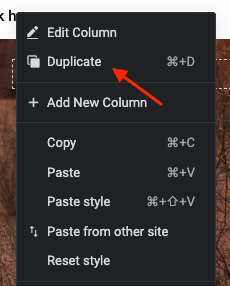
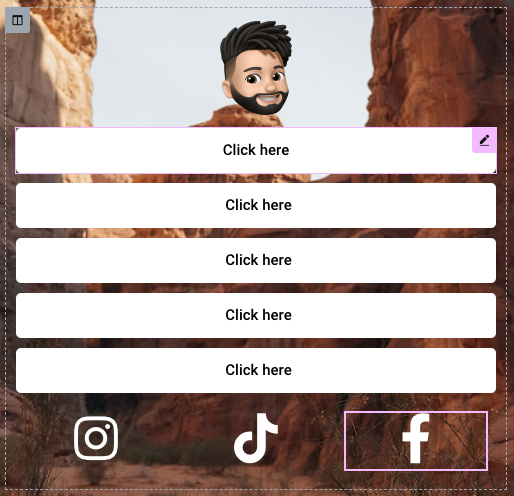
You know have the simple design of your buttons. You can now right click on your button and duplicate this as many times you need based on the number of links you have. For now let’s create 5 more.
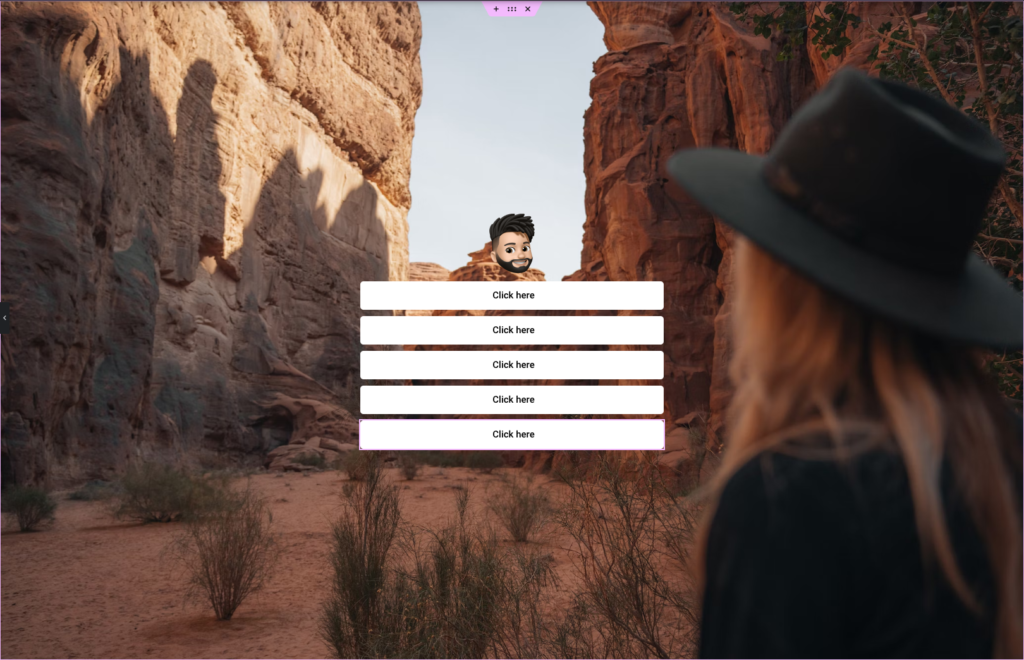
Adding links
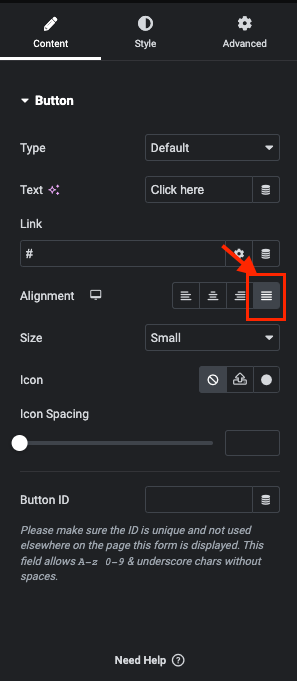
Add links to your buttons by clicking the specific button and on the content panel in the edit panel find the link section and copy and paste your link you want to send traffic to. You can change the text from “Click here” to whatever you like right above the link field.
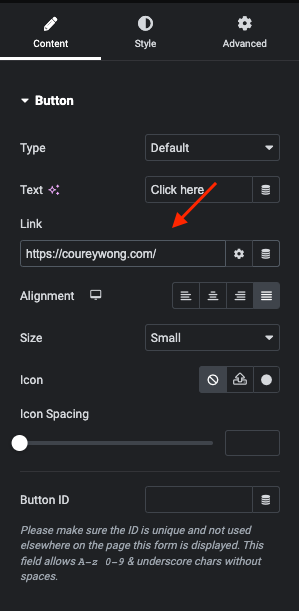
If you want visitors to open a new page when they click on a button just click the gear icon next to the link input field a few options pop up and check the box that says “open in new tab” and you’re done.
Add social icons
There are two ways you can add social icons
- The elementor icon library or
- Add custom images
You can find great resources to icons such as flaticons but let’s use the elementor icon library for now
Before adding the icons you need to add the element “inner section”. This will allow you to create columns within the section for multiple icons.
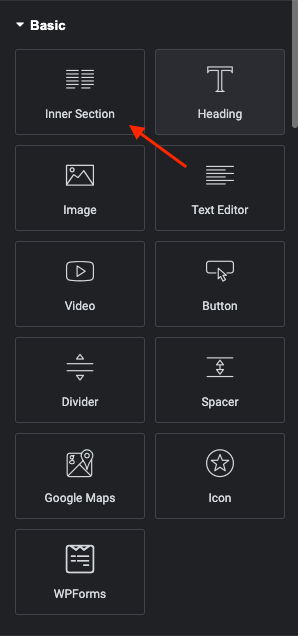
You should now see 2 columns by default
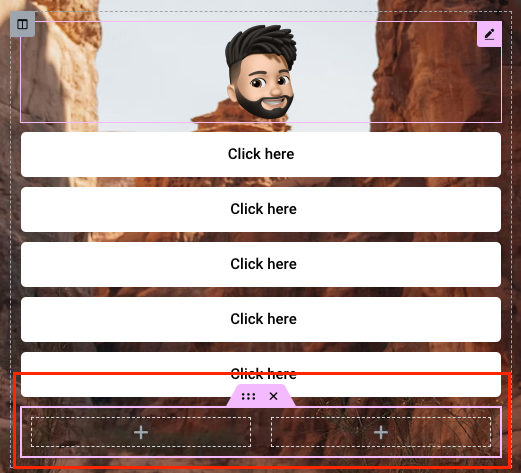
Depending how many social links you have will determine the adjustments we need to make. Let’s do 3 for now by right clicking the grey box in the corner of one of the columns and select duplicate.

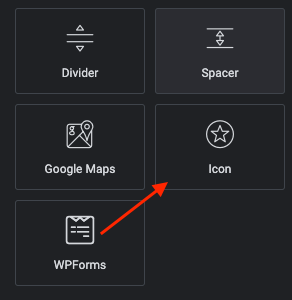
Next find the icon element in the element panel and drag into one of the inner section element you just added.
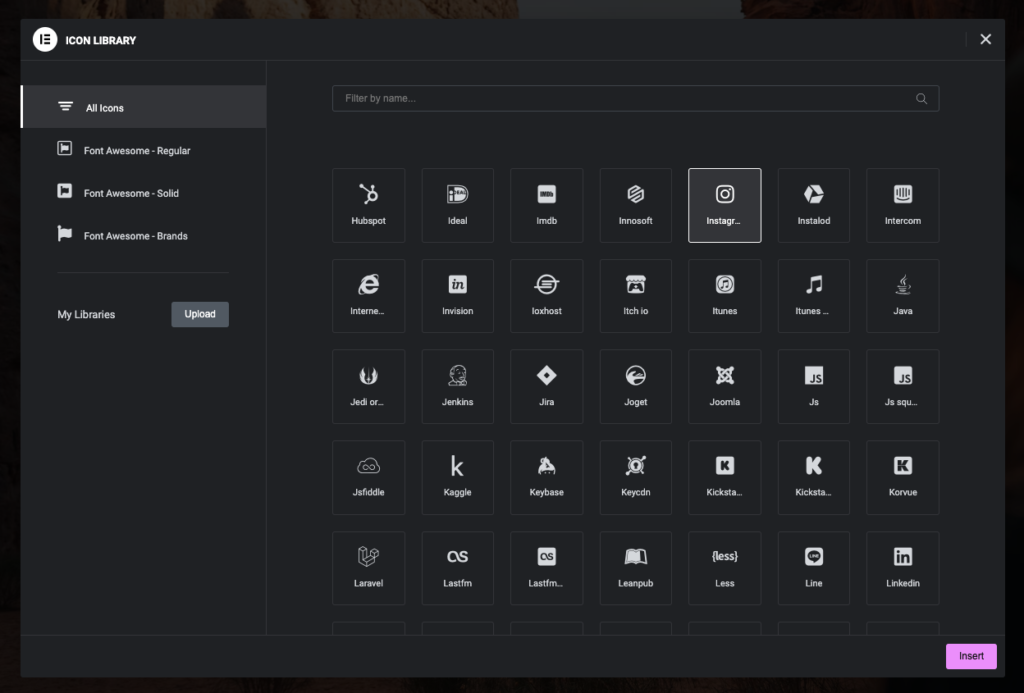
Once you dragged the first element you can now make your edits within the edit panel. Hover over the default icon given, then 2 buttons should pop up. Click on the button that says “icon library” now in the search bar look up instagram and select the icon. It should now appear in the column you placed the icon. You can change the color in the style panel.
Now repeat and find the social icons you want to use such as twitter, facebook, or tiktok.
Next we want to adjust the columns width so they stay the same for all devices.
Switch to mobile mode from the responsive menu to do this step.
For each column in the inner section element click on the grey corner box to select each column of the icon and in the edit panel on the left locate the “Column width(%)” property. Since we have 3 columns we want them to be equally spaced out so we will type 33.
This will make each column 1/3 of the width for the full section.
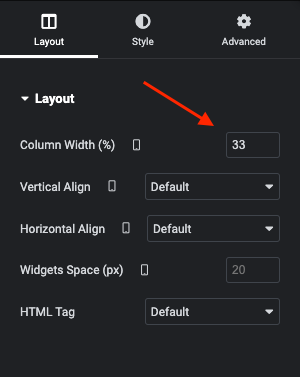
Note: if you had four icons you would make it 25. The simple math is 100 divided by the number of icons you have. So for example if you had 6 icons that would be 100/6 (honestly if you have a lot of accounts you might want to make button links for them).
Once you add you social icons you can now add the links for each. The link field can be located in the edit panel after you click on the icon you want to edit.
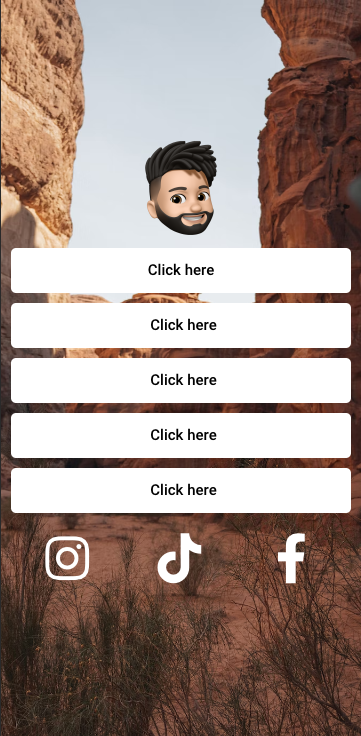
After you have created your icons and if you are still in responsive mobile your page should look like the image below.
You can now preview your page by selecting the eye icon at the bottom of the edit panel.
Step 6 Publish
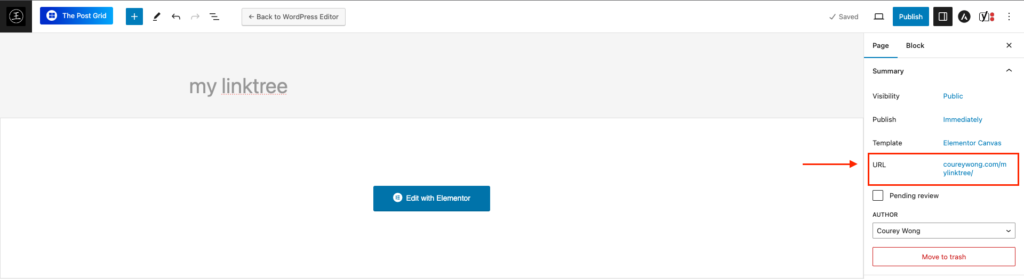
If everything looks good, you can publish your page and then type the url of the page to really take a look of your very own linktree page on your phone. (you can find the url link when you return to the main page after leaving elementor builder).
If everything is to your liking then you now have yourself your very own linktree and can post in your bio for all your followers.